Never miss breakfast again!

I’ve actually found a breakfast that beats my smoothie in preparation quickness and ability to satiate my morning hunger. There are a myriad of recipes out there for overnight oats, so no shortage on ideas for additives!  Another Root got me started, so I recommend this blog for more details. I tend to keep it basic when I’m busy or when I’m needing to be extra frugal. I love making my own almond butter and strawberry jam, but that’s just not always realistic.  I say it’s better for your body (and your bank account) to eat a breakfast you prepared yourself, than something from the drive-through or vending machine…or nothing at all!

The easiest breakfast on the go!

The easiest breakfast on the go!

Here’s the basics:

1/2 cup old fashioned rolled oats (as opposed to quick oats)

1/2 cup liquid (I use non-dairy milk such as almond or coconut)

1 tablespoon nut butter or chopped nuts (I use almond butter)

1 tablespoon jam or berries or other mash-able fruit (a jar of jam lasts in the fridge and a bag of berries in the freezer!)

Other recipes suggest adding mashed banana and maple syrup, but I’ve found it’s not necessary.  Although it adds a delicious sweetness, so add ’em if you’ve got ’em!  Adding some chopped nuts or shredded coconut the morning of for some texture is nice, too.  Again, I’m keeping it as simple as I can lately.  I’ve been too busy for bananas!

Here’s my prep:  

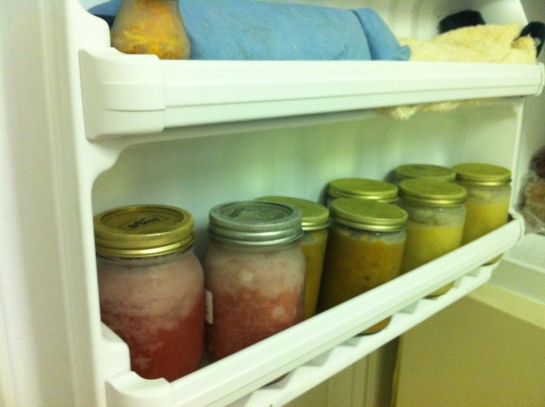
On Sunday, I label 5 containers for Monday through Friday.  I add my oats, milk, nut butter and jam or fruit to each jar, and I put the jars in the fridge.  Breakfast is done, dude!  I usually grab a jar and spoon to mash it all together as I walk out of the house.

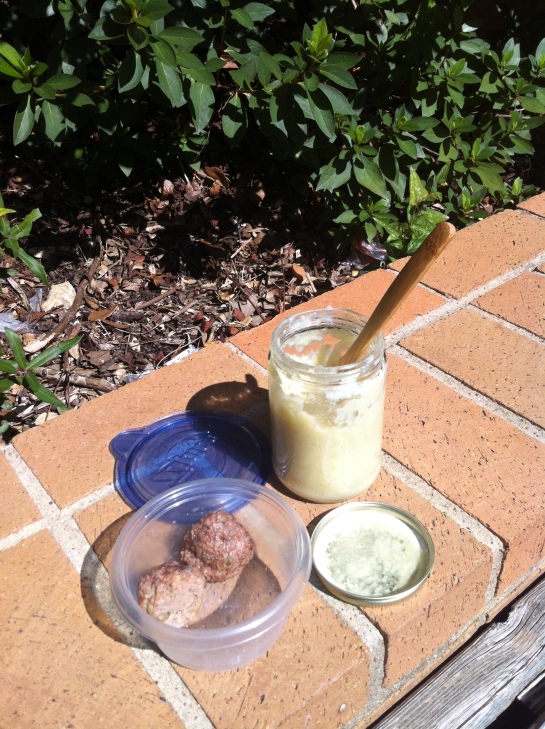
I do get tired of the same thing every morning, so I make two different kinds for the week.  In the photo, I have nut butter and jam for Monday-Wednesday.  Thursday and Friday have a small container of nuts and coconut to add those mornings (otherwise they’d get soggy).  I replaced the nut butter with chopped nuts and replaced the fruit with 1/2 teaspoon coco powder (or chocolate chips) and 1/2 tsp maple syrup.

Everything but the….

When I’ve been busy and the veggies are nearing their expiration, I usually chop ’em and roast ’em as a quick way to avoid losing them to the compost bin. That’s worked great, but I wanted to try something different this time. Being iced in today, I decided to try a recipe a dear friend shared with me called Kitchen Sink Soup. The thing I’m discovering I love about soup is that you can’t go wrong! I basically cleaned out the vegetable bin into a stock pot. Here’s a list of what I threw in mine:

2 turnips (peeled and diced)
2 red beets (peeled and diced)
Some celery that was wilting (chopped)
1 onion (diced)
A few small garlic cloves that were too small to be useful (chopped a bit)
Some lettuce that was wilting (torn into smallish pieces)
Some left over carrot ginger soup I’d made that didn’t turn out very well
1 sweet potato (peeled and chopped into medium-sized chunks)
Some left over roasted acorn squash wedges that I wasn’t fond of (I sliced off the tuff skin)
Juice of 1 lime that I forgotten about
salt, pepper and tarragon
Enough almond/coconut milk to mostly cover everything
Water to thin the consistency after I used an immersion blender to smooth it all out into soup.

I put the garlic and onion in the pot first with a spoonful of coconut oil to soften them up for a few minutes on medium-low heat. Then, I tossed everything in the pot, brought it to a boil, turned down the heat, put a lid on it, and simmered it until the sweet potato chunks were really soft. I let it cool a bit before blending.I have to admit, it looked absolutely awful when it was cooking. I thought maybe I’d taken the “everything but the kitchen sink” thing a bit too far, and I about wrote it off as a failed experiment. I saw it through, and toward the end, it started turning a nice tomato red. When I blended it all up, it turned a fantastic bright red!

Fuel for the mind and body on a cold day...and I cleaned out the veggie bin!

Fuel for the mind and body on a cold day…and I cleaned out the veggie bin!

Quinoa pronounced kēn-ˌwä

Quinoa pronounced kēn-ˌwä

Cold weather version of my favorite breakfast! In the summer I love quinoa with avocado, tomato, olive oil and maybe a splash of Braggs or tamari. My sister replaces the avocado with cucumber (She’s missing out on some good-for-you fats, but it’s still tasty.) This recipe uses pumpkin pie spice, pecans, pomegranate arils, dried fruit and a little agave. Yum 🙂 You don’t have to toast the pecans, or you can keep toasted pecans on hand. I prepped the pomegranate by hand, but that can be done in advance or you can buy them prepared at Central Market and probably other stores.

Quick, breakfast!

Banana, nutbutter, milk smoothie. Enjoy! :)

Banana, nutbutter, milk smoothie. Enjoy! 🙂

Three ingredients in a blender. It doesn’t get much quicker than my favorite smoothie.  It was a great meal before or after a bike ride…when I used to train on my bike :/  Now, it’s perfect for when I just don’t have time to sit down with a utensil.  I keep my bananas in the fridge which turns the peels brown, but makes them last longer.  I use original almond milk and creamy almond butter ’cause I don’t like dairy milk, and I’m not a huge fan of peanuts.

If you think it will help your mornings go more smoothly to do some prep or you want to freeze some emergency bananas, I suggest slicing, freezing and then store one banana per baggie.  I don’t usually take the time to do this, but it really doesn’t take long.

Freezing like this keeps fruits from becoming a chunk of banana ice the blender can't handle

Freezing like this keeps fruits from becoming a chunk of banana ice the blender can’t handle

In case of emergency, make smoothie!

In case of emergency, make smoothie!

Go Frogs!

Go Frogs!

All souped up for the next week with cauliflower soup and red cabbage soup. I wasn’t sure how the red cabbage would turn out, but it’s delicious and a really pretty TCU purple!

My mom combined several recipes to make a simple, easy cauliflower soup (see recipe below).  It’s that time of year, so we’ll probably get a head of cauli every week until March from Elizabeth Anna’s community supported agriculture (CSA) group. Yea!

I’ve gotten better at putting foods together and relying less on recipes, but I still like to have a guide.  For the cabbage soup, I have yet to use the variety of cabbage that is listed.  I never have scallions on hand, so onions work fine.  I use whatever potatoes I have…it’s soup, not rocket science!  Enjoy.

Cauliflower Soup

50 grams butter ( about 1/4 cup or 1/2 stick)
1 chopped onion
1 clove garlic chopped

Cook these about 5 minutes or until soft.

Add 1/2 cauliflower head
1 large potato peeled and chunked
900 ml ( about 3 2/3 cups) hot chicken or veg stock

Bring to a boil and simmer 20 minutes.  Remove from heat and cool slightly; purée with stick blender.

Blanch remaining 1/2 head of cauliflower in salted water for 6 minutes. Drain and refresh in cold water.

Add 142 ml (1/3 cup) milk or cream to puréed part and reheat.  Season to taste.  Add blanched florets.  Serve in oven proof bowls with sprinkling of gruyere or Swiss cheese on top. Heat under broiler until bubbly. Sprinkle with fresh parsley to serve.


Soup on deck!

Soup on deck!

Future meals are waiting in the freezer.  I’m taking the time to cook two soups a week.  I store them in serving-size container and freeze half of them.  The soups I make are easy, one-pot meals.  It takes some time preparing, but I save time during the hectic school/work week and always have a healthy meal.  No more starving or succumbing to eating lesser quality food out when I shouldn’t be spending the money anyway.  What’s that saying? If you fail to plan, you plan to fail.  I’m trying to plan ahead here!

I used up some zucchini that were threatening to spoil using this Zucchini Soup recipe from a new find, Primally Inspired.  The Nourishing Gourmet has a very similar one using thyme, but I haven’t had a chance to try it for myself.  The other soup pictured is from a mix that had been taking up space in the cabinet for too long! Time to put those dry goods to use!

Lunch is served

Lunch is served between classes enjoying the sunshine by the fountain.

…between classes enjoying the sunshine by the fountain.  Green cabbage soup with beef and goat meatballs.

I was looking for a dairy-free ice cream recipe when I discovered The Nourishing Gourmet.  Kimi posts great recipes and healthful information.  I used her recipe for these meatballs.   I doubled the batch, so I used 1 lb goat meat mixed with 1 lb grass fed beef.  I freeze them on a plate before putting them in a container.  Just grab three frozen meatballs and a jar of soup to go!  They will be thawed in time to eat.

I’m sharing ideas here that work for me, but if you have any questions about food safety, please search out appropriate information.  I don’t eat a ton of meat because I’ve learned my body doesn’t require much in the form of animal protein.  Too much makes me feel sluggish or even ill.  Also, I’m just not a huge fan of animal meat.  I’m just more comfortable with vegetables.   It’s easy to tell when they go bad to the point you shouldn’t eat them, and they are so easy! Veggies come in their own packing. They can be eaten raw, roasted or steamed and more!

I’m a non-tradi…

I’m a non-traditional student which means I know what life is like after high school and college, but I’m back on in the classroom. I’ve been spoiled with adequate sleep and nutritious food, and now I’m living in the land of late-night study and Ramen noodles. Doritos and Hostess are not going to fuel my mind and keep the returning-student-15 off my relatively sedentary self. It’s a priority and a struggle, and I see the losing battle of my classmates everyday. I decided to share my ideas here in hopes that a fellow student, teacher, cube-dweller or whoever will benefit….and hopefully share some tricks with me 🙂